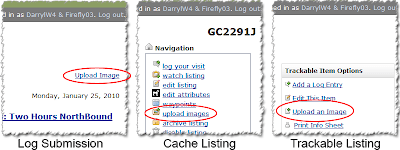
 Now that you have your photo prepped and ready for Geocaching.com, it's time to upload it. Geocaching.com allows uploads to log, cache listings, and trackables. All work in about the same way, they're just initiated through a little different method. In all cases you'll find the link toward the upper right corner of the page, though labeled differently in each case. After submitting a log, look for the "Upload Image" link. On caches you own, look for the "upload images" link, or on your trackable, look for the "Upload an Image" link.
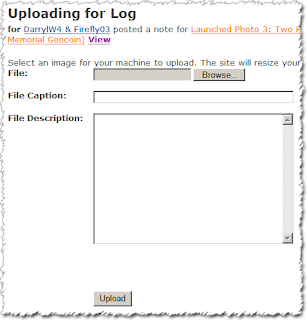
  When you click on that link you will be presented the image upload page (see the clipping to the right). You'll start by clicking on the "Browse..." button to the right of the "File" title. That brings up a dialog where you'll navigate your local files to find the one you want to upload. Once that's selected you can fill in the "File Caption" field with the title of your photo, and the "File Description" field with the story behind your photo. Both of these fields are optional, but I prefer to at least give the photo a title. When you're ready just click on the "Upload" button beneath the "File Description" field and wait. The upload time depends on the speed of the connection to the servers, but your 600px x 600px JPEG shouldn't take long over a broadband connection. Once completed you'll see your photo with a few options including to upload another image. If you're sending up several photos, just repeat this process till all you photos are on Geocaching.com. All of them will be tied to the log (if that's where you uploaded them), or in the gallery for either the cache or trackable. Come back next week I'll spend some time on grabbing that image URL and how you can insert that photo into your cache or trackable description.
Text and images in this post are copyright 2010 by Darryl Wattenberg, all rights reserved.

No comments:
Post a Comment